DIY Aquaponics Systems: Complete Build Guide for Beginners
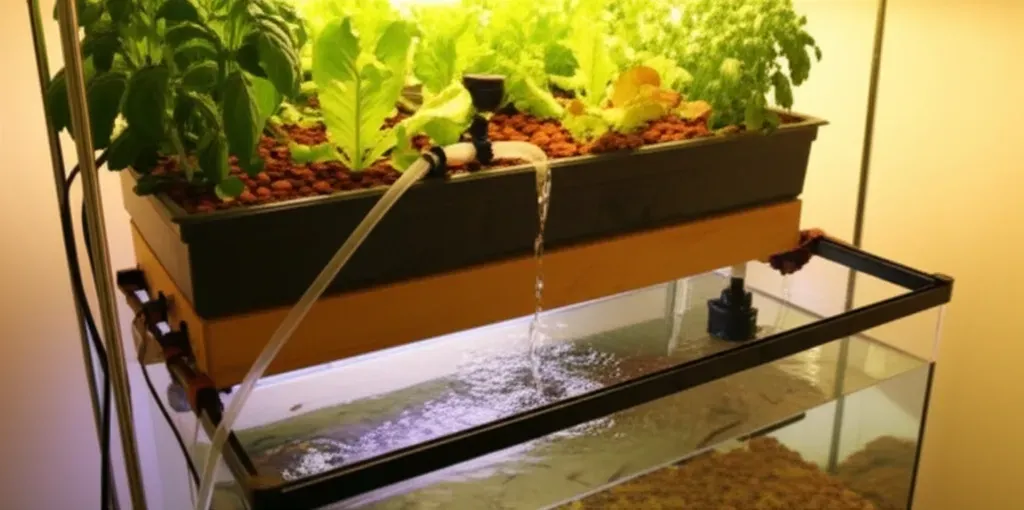
Building a DIY aquaponics system means combining a fish tank, grow bed, and water pump into a self-sustaining ecosystem where fish waste fertilizes plants while plants filter water for fish. This guide walks you through selecting components, assembling your first system, and establishing the beneficial bacteria that make the whole cycle work, typically ready for fish and plants within 4-6 weeks of starting.
Table of Contents
- Understanding Aquaponics Basics: How the System Works
- The Three Essential Components
- The Nitrogen Cycle Explained Simply
- What You Can Realistically Grow
- Planning Your First System: Size, Location, and Budget
- Choosing the Right System Size
- Location Selection and Requirements
- Complete Budget Breakdown
- Materials and Tools You'll Need
- Essential Components Shopping List
- Tools and Safety Equipment
- Testing and Monitoring Supplies
- Step-by-Step Build Instructions
- Step 1: Setting Up the Fish Tank
- Step 2: Preparing and Positioning the Grow Bed
- Step 3: Installing the Plumbing System
- Step 4: Adding Grow Media
- Cycling Your System: The Critical First 4-6 Weeks
- Fishless Cycling Methods
- Week-by-Week Cycling Timeline
- Testing Schedule and What the Numbers Mean
- How to Know When Your System Is Ready
- Adding Fish and Plants: Your First Stocking
- Selecting and Acclimating Fish
- Plant Selection and Placement
- Initial Feeding Guidelines
- Ongoing Maintenance and Troubleshooting
- Daily and Weekly Tasks
- Monthly Maintenance Procedures
- Common Problems and Solutions
- When to Perform Water Changes
You're about to create a closed-loop system that produces both protein and vegetables from the same water. The setup requires more planning than a traditional garden, but once cycling completes, maintenance drops to feeding fish and monitoring a few water parameters.
Understanding Aquaponics Basics: How the System Works
Aquaponics combines recirculating aquaculture with soilless plant growing in a symbiotic relationship where each component supports the others (USDA National Agricultural Library). Fish produce ammonia-rich waste, beneficial bacteria convert that ammonia into plant-available nitrate, and plants absorb those nutrients while cleaning the water that returns to the fish tank.
This isn't a new farming method. It's an engineered ecosystem. The biological processes mirror what happens in natural ponds and wetlands, just concentrated and optimized for food production in your backyard or basement.
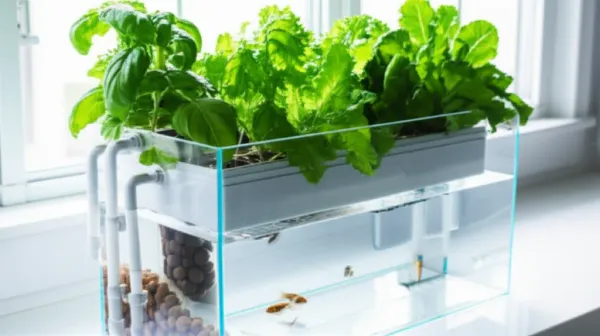
The Three Essential Components
Your fish tank holds the fish and serves as the system's nutrient source. Water volume determines how many fish you can stock, more water dilutes waste and provides stability when parameters fluctuate. For example, with a 50-gallon tank, you could safely start with 3-5 pounds of fish, expanding to 7-10 pounds as you gain confidence in maintaining water quality.
The grow bed sits above the fish tank and contains your plants anchored in porous media like expanded clay or gravel. This media hosts the beneficial bacteria colonies that perform the actual waste conversion, making it the biological heart of your system (ATTRA Sustainable Agriculture).
A water pump moves nutrient-rich water from the fish tank up to the grow bed. Gravity returns the filtered water back to the fish, creating continuous circulation. The pump runs 24/7 in most beginner systems, though timer-controlled flood-and-drain cycles work too.
The Nitrogen Cycle Explained Simply
Fish excrete ammonia through their gills and waste. Nitrosomonas bacteria colonize your grow media and convert that toxic ammonia into nitrite, still toxic, but less so. Then Nitrobacter bacteria convert nitrite into nitrate, which is harmless to fish at typical concentrations and exactly what plants need for growth (Michigan State University Extension).
This two-step conversion process is called nitrification. It happens automatically once bacteria populations establish, but those colonies take 4-6 weeks to build up sufficient numbers to handle your fish's waste output.
Plants absorb nitrate through their roots, removing it from the water before it cycles back to the fish. This creates a balanced system where fish feed plants, plants clean water, and bacteria make the conversion possible.
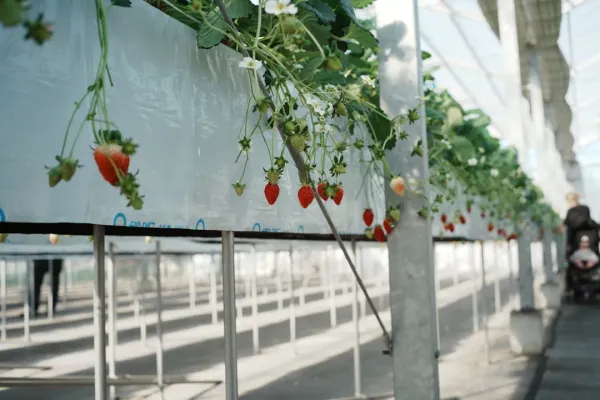
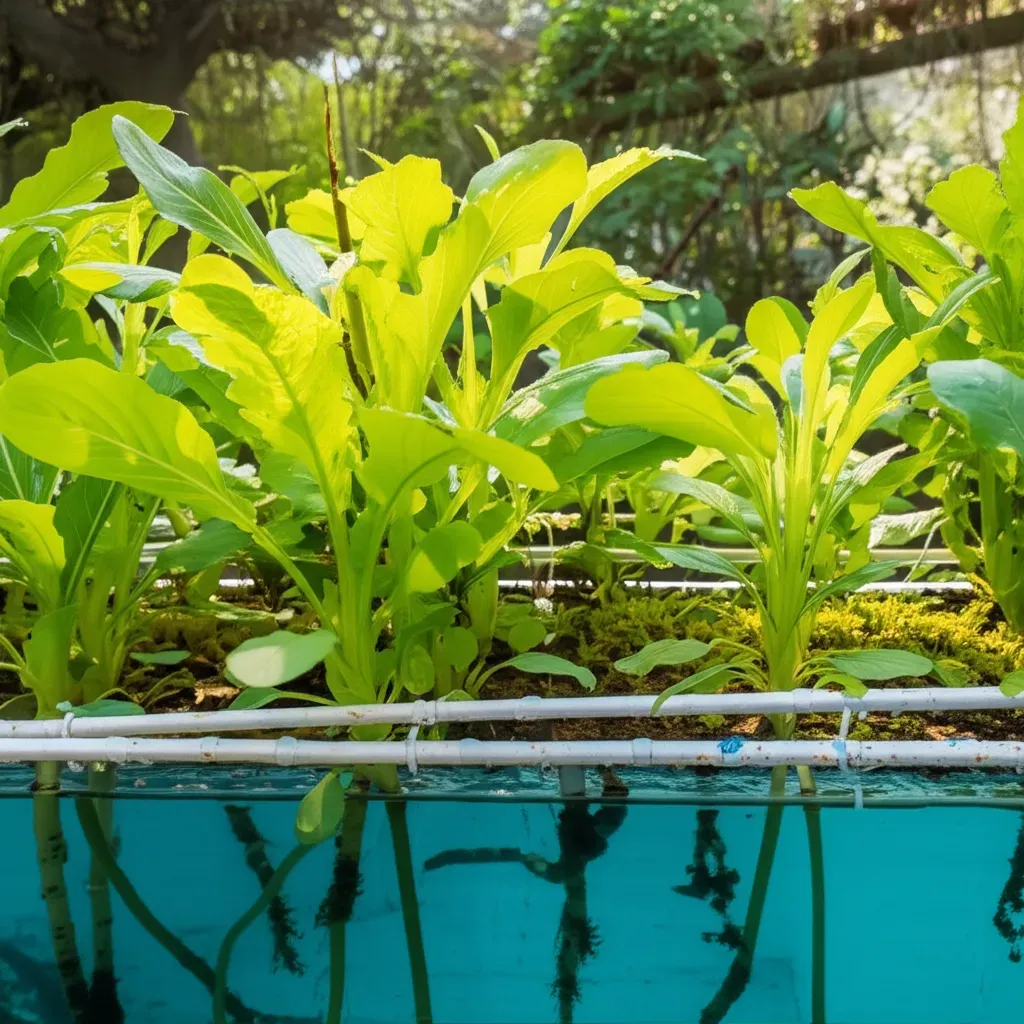
What You Can Realistically Grow
Leafy greens and herbs thrive in beginner systems because they have low nutrient demands and fast growth cycles. Lettuce, basil, mint, and cilantro typically reach harvest size in 4-6 weeks (ATTRA Sustainable Agriculture). Chard, kale, and pak choi perform equally well.
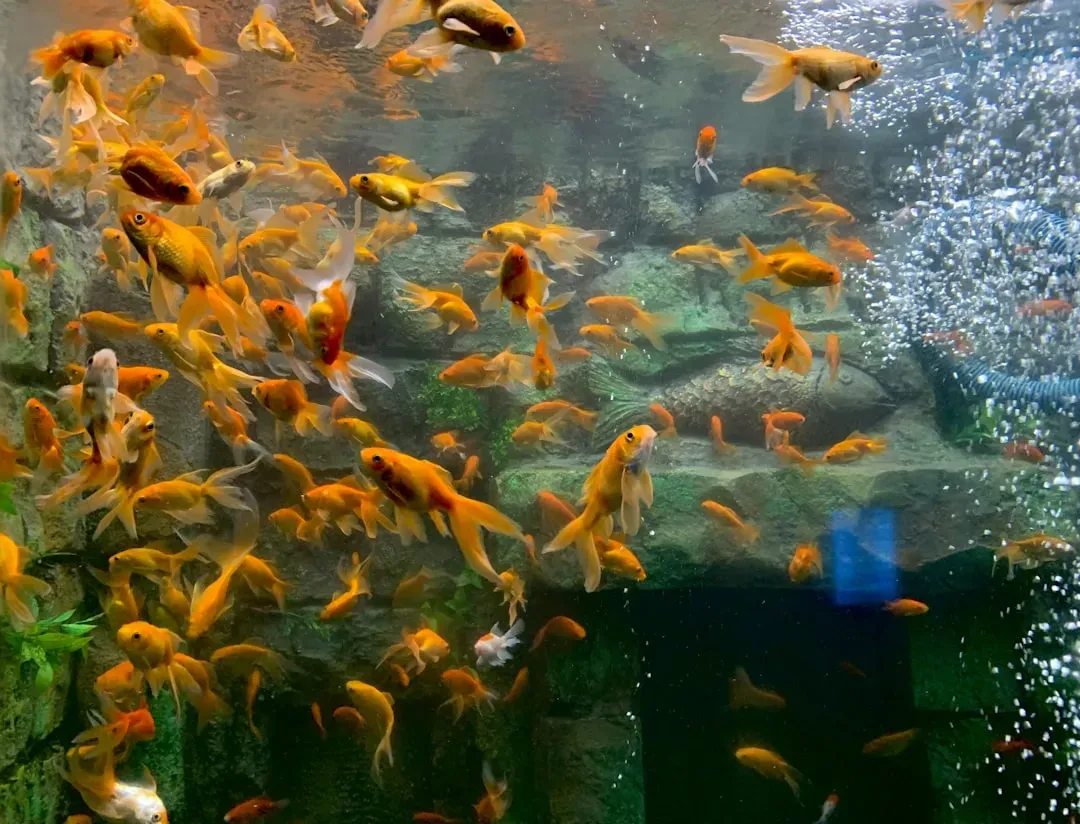
For fish, goldfish and koi tolerate the water quality swings common in new systems. Once you've stabilized parameters, tilapia grow quickly and taste better, though they require warmer water (75-85°F). Catfish offer another hardy option for beginners and can handle a range of environmental conditions.
A 50-gallon fish tank with a 50-gallon grow bed produces roughly 10-15 heads of lettuce every three weeks once fully established. I still remember the satisfaction of harvesting my first basil crop just five weeks after planting—the leaves were so fragrant they perfumed my entire garage. That same system produced lettuce that tasted noticeably sweeter than store-bought, which convinced my skeptical wife that this aquaponics experiment was worth the space it occupied.
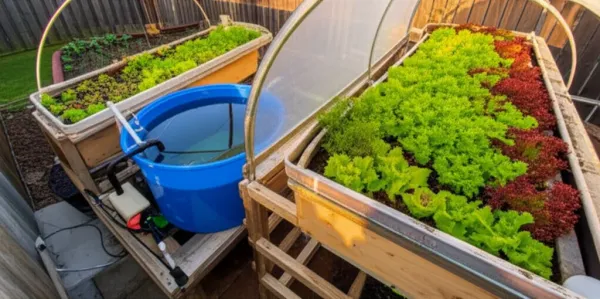
Planning Your First System: Size, Location, and Budget
Your first system should be large enough to remain stable but small enough to manage without overwhelming complexity. Bigger water volumes buffer against parameter swings better than tiny desktop systems, but they also cost more and require stronger structural support. Take a 50-gallon fish tank: it weighs roughly 600 pounds when filled with water and media, so well, make sure your floor can handle it.
Beginner-Friendly Plants for Aquaponics Systems
| Plant Type | Nutrient Demand | Growth Cycle | Harvest Time | Difficulty Level |
|---|---|---|---|---|
| Lettuce | Low | Fast | 4-6 weeks | Very Easy |
| Basil | Low | Fast | 4-6 weeks | Very Easy |
| Mint | Low | Fast | 4-6 weeks | Very Easy |
| Cilantro | Low | Fast | 4-6 weeks | Very Easy |
| Chard | Low | Fast | 5-7 weeks | Easy |
| Kale | Moderate | Medium | 6-8 weeks | Easy |
| Pak Choi | Low | Fast | 5-7 weeks | Easy |
Choosing the Right System Size
Start with a 50-100 gallon fish tank paired with an equal-volume grow bed. This size provides enough biological stability for beginners while fitting in most garages, basements, or patios without requiring reinforced flooring.
A 50-gallon system fully loaded with water, media, and equipment weighs roughly 600 pounds. A 100-gallon setup approaches 1,200 pounds. Check your floor joists or patio slab before committing to larger systems, concentrated weight can cause structural damage over time.
Expect to harvest 8-12 lettuce heads per month from a 50-gallon grow bed, or 15-20 heads from a 100-gallon bed once the system matures. These yields assume proper stocking density and consistent care.
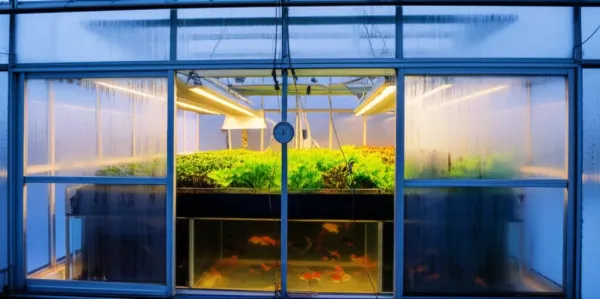
Location Selection and Requirements
Plants need 6-8 hours of direct sunlight daily for productive growth, or equivalent output from grow lights if you're building indoors. South-facing locations maximize natural light in northern climates, while greenhouses or shade cloth prevent overheating in hot regions.
Position your system near a water source for easy top-offs, evaporation and plant transpiration remove 1-2 gallons daily from a 100-gallon system. You'll also need a GFCI-protected electrical outlet within reach of your pump cord, typically 6 feet or less unless you use outdoor-rated extension cords.
The surface must be level within 1/4 inch across the footprint. Unlevel systems drain unevenly, stress plumbing connections, and create dead zones where solids accumulate. Concrete, composite decking, or reinforced shelving work well, but avoid soft soil or uneven ground.
Access to drainage matters during maintenance. You'll periodically need to drain 10-20% of system volume for water changes or cleaning, so proximity to a floor drain, garden bed, or lawn simplifies disposal of nutrient-rich water.
Complete Budget Breakdown
A basic 50-gallon media bed system costs $300-500 using repurposed containers and budget components. This includes a stock tank ($80-120), plastic storage tote for the grow bed ($20-30), aquarium pump rated for 200 GPH ($30-50), 20 gallons of expanded clay media ($40-60), PVC plumbing ($20-30), and basic water test kit ($25-40).
Mid-range builds using purpose-built IBC totes or fiberglass tanks run $600-900. You'll get better durability, cleaner aesthetics, and often more efficient pumps, but the biological performance remains identical to budget builds.
Premium systems with commercial-grade components, automated monitoring, and backup power reach $1,200-2,000 for a 100-gallon setup. These make sense if you're treating aquaponics as serious food production rather than an experimental hobby.
Money-saving alternatives include sourcing food-grade IBC totes from industrial suppliers ($50-75 versus $150 new), using pea gravel instead of expanded clay ($15 per 50 pounds), and starting with goldfish ($2-5) instead of tilapia fingerlings ($8-15 each). Just avoid containers that previously held chemicals or non-food products, residues can poison your fish.
Materials and Tools You'll Need
Shopping for your first system means distinguishing between essential components that make the system function and optional upgrades that improve convenience or performance. Start with the minimum viable setup, then add monitoring tools and automation as you gain experience.
Essential Components Shopping List
Fish tank: 50-100 gallon stock tank, IBC tote (cut in half), or repurposed aquarium. Must be food-safe and never held chemicals. Avoid galvanized metal, which leaches zinc toxic to fish.
Grow bed: Plastic storage tote, cut IBC tote, or wooden frame lined with pond liner. Needs 12-inch depth minimum to support media and root growth. Opaque materials prevent algae better than clear containers.
Water pump: Submersible aquarium pump rated for 200-400 GPH (gallons per hour) for a 50-gallon system. Flow rate should cycle total system volume once per hour. Adjustable flow pumps offer flexibility as you dial in drainage timing.
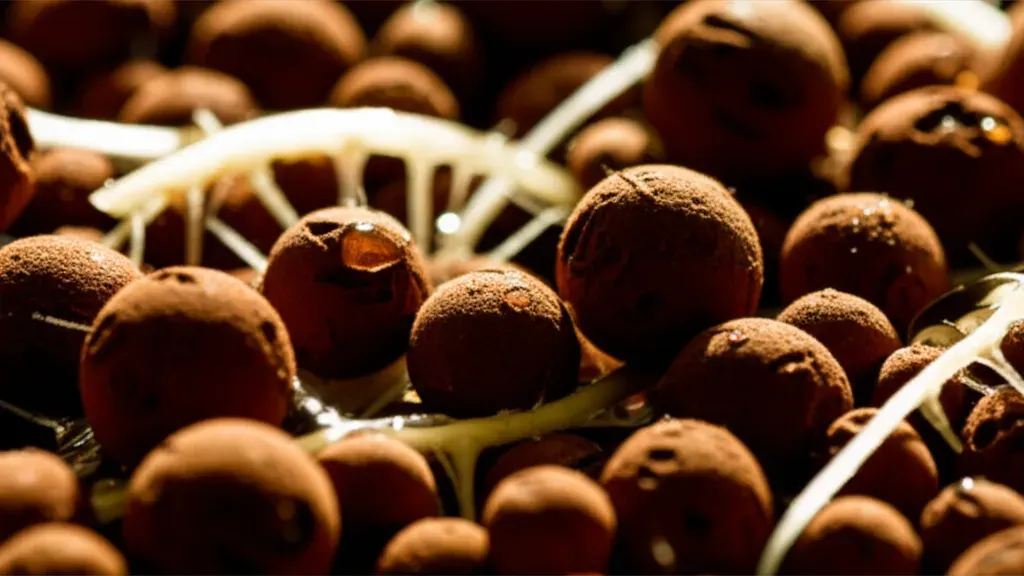
Grow media: Expanded clay pellets (Hydroton), lava rock, or pea gravel. Need 15-20 gallons for a 50-gallon grow bed filled to 10-inch depth. Rinse thoroughly before use, clay dust clogs pumps and clouds water for weeks.
Plumbing supplies: 1/2-inch vinyl tubing (10 feet), 1-inch PVC pipe for drainage (5 feet), bulkhead fittings for grow bed (2), uniseals or grommets, PVC cement, and adjustable ball valve to control flow. Size drainage larger than input to prevent overflows.
Bell siphon kit or timer: Bell siphons create automatic flood-and-drain cycles using water pressure and air locks. Timers offer simpler setup but require precise flow calibration. Most beginners find timers more forgiving during initial tuning.
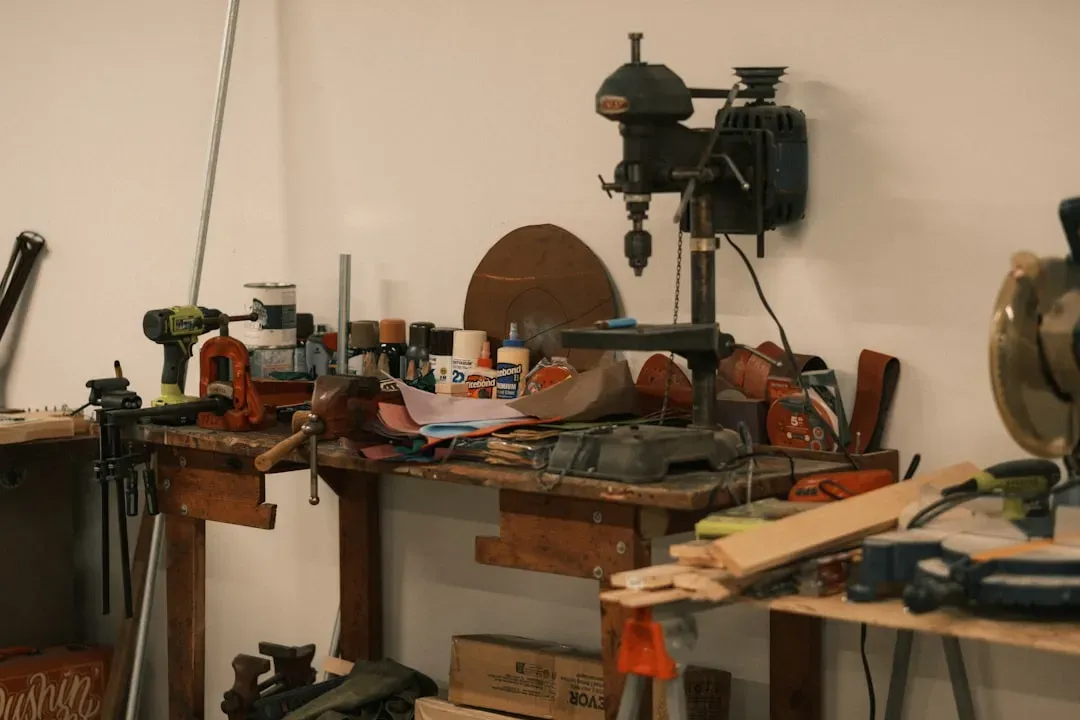
Tools and Safety Equipment
Basic tools cover most construction: drill with 1-inch and 2-inch hole saws, adjustable wrench, PVC cutter or hacksaw, measuring tape, and level. A silicone sealant gun helps waterproof bulkhead connections.
Electrical safety requires a GFCI outlet or GFCI adapter for your pump. Water and electricity create shock hazards, ground fault protection cuts power instantly if current leaks. Keep all electrical connections above water level and use outdoor-rated components for exterior systems.
Testing and Monitoring Supplies
Water test kit measuring pH, ammonia, nitrite, and nitrate is non-negotiable. API Freshwater Master Test Kit ($25-35) provides enough reagents for 800+ tests using liquid drops, more accurate than test strips. You'll test daily during cycling, then weekly once established.
Aquarium thermometer monitors water temperature, which affects fish metabolism, bacteria activity, and dissolved oxygen levels. Stick-on external thermometers work fine, though digital probes give faster readings.
A notebook or spreadsheet for logging test results helps you spot trends before they become problems. I've watched too many beginners rely on test strips during their first cycling attempt, only to miss a critical ammonia spike because the color gradations are maddeningly subtle. After my neighbor lost half his goldfish to what strips showed as "safe" levels, I walked over with my liquid test kit and discovered ammonia at 2 ppm—the drops turned that unmistakable shade of green that strips simply can't replicate accurately. Tracking pH drift over weeks reveals media buffering capacity or fish stocking issues invisible in single readings.
Step-by-Step Build Instructions
These instructions describe building a flood-and-drain media bed system using a timer-controlled pump, the most beginner-friendly design that eliminates bell siphon troubleshooting. The sequence matters because repositioning a filled fish tank or loaded grow bed risks spills and structural damage.
Step 1: Setting Up the Fish Tank
Position your fish tank in its permanent location before filling. Moving a filled 50-gallon tank is nearly impossible without draining it first. Use a 4-foot level to check that the rim sits level in all directions, shim with composite shims if needed.
Rinse the tank with clean water only, no soap. Soap residue kills fish and disrupts bacteria colonization. If using a repurposed container, scrub away any debris or film, then rinse three times.
Fill the tank with dechlorinated water. Municipal water contains chlorine or chloramine that kills beneficial bacteria and fish. Add dechlorinator following bottle instructions, or let water sit uncovered for 24-48 hours to allow chlorine to evaporate (chloramine requires chemical treatment).
Step 2: Preparing and Positioning the Grow Bed
Drill a 1-inch drainage hole in the grow bed bottom, positioned above the fish tank's center. Install a bulkhead fitting or uniseal to create a watertight connection for your drainage pipe. The standpipe height inside the grow bed determines maximum water level during flood cycles.
Position the grow bed directly above the fish tank, supported by a sturdy frame or shelf. The structure must support 500+ pounds when the bed fills with water and media. Cinder blocks, metal shelving rated for the weight, or custom-built wooden frames work well.
Verify the grow bed sits level using a 2-foot level placed in multiple directions. Unlevel beds drain toward one side, creating dry zones where plants struggle and wet zones where roots drown.
Connect a 1-inch PVC drain pipe from the bulkhead down into the fish tank, terminating below water level to reduce splashing. A 90-degree elbow at the bottom directs flow horizontally, preventing substrate disturbance.
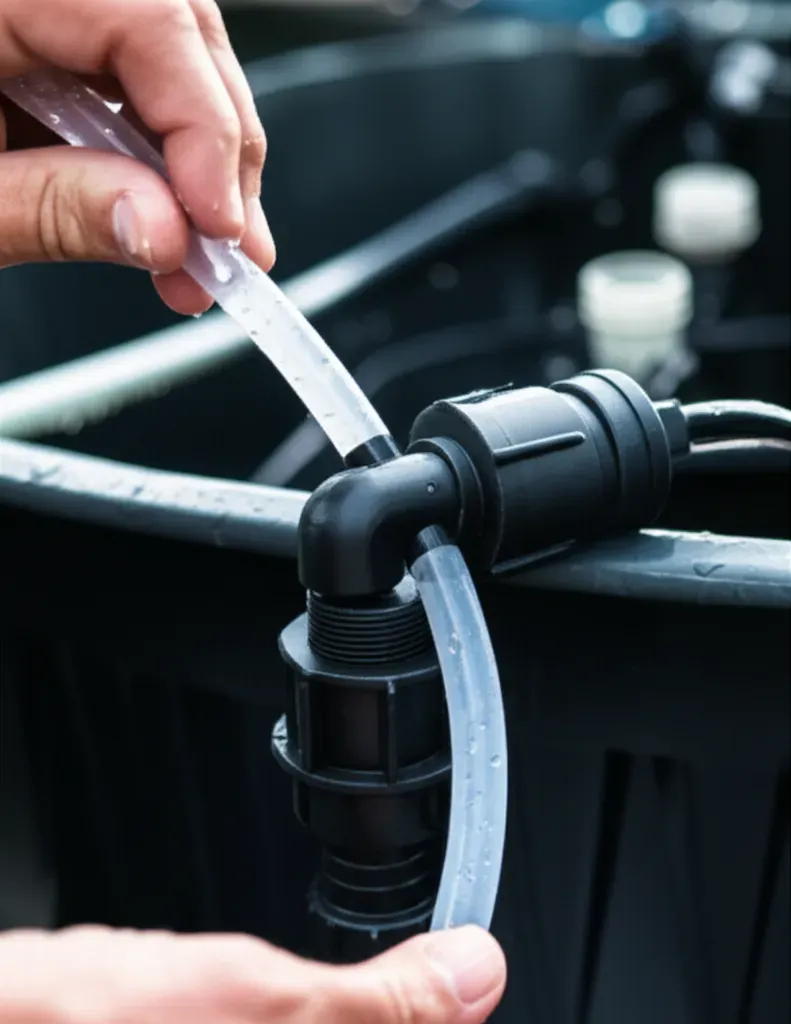
Step 3: Installing the Plumbing System
Place the submersible pump in the fish tank, positioned to avoid sucking up solids that settle on the bottom. Attach 1/2-inch vinyl tubing to the pump outlet, running it up and over the grow bed rim.
Install a ball valve on the tubing between pump and grow bed. This valve lets you adjust flow rate to match your drainage capacity, critical for preventing overflows during the flood cycle.
Secure the tubing end inside the grow bed so it won't whip around when the pump starts. A PVC spreader pipe with small holes distributes water evenly across the media surface, but a simple tube positioned near the center works for basic systems.
Plug the pump into a timer set for 15 minutes on, 45 minutes off. This cycle floods the grow bed, then drains it completely before the next cycle. Adjust timing based on your pump's flow rate and drainage speed, the bed should flood to 1-2 inches below the surface, then drain completely.
Step 4: Adding Grow Media
Rinse your grow media in a bucket or wheelbarrow before adding it to the bed. Expanded clay creates massive dust clouds that turn your water into murky soup for days. Rinse until the water runs clear, which takes 5-10 rinses for most media.
Fill the grow bed to 10-12 inches deep, leaving 2 inches of freeboard at the top. This depth provides adequate root space and biological filtration surface area while preventing media from washing over the sides during flooding.
Run the system through several flood-and-drain cycles without fish or plants. Watch for leaks at bulkhead connections, verify complete drainage between cycles, and confirm the pump delivers enough flow to flood the bed within your timer setting.
Cycling Your System: The Critical First 4-6 Weeks
Cycling establishes the beneficial bacteria colonies that convert toxic ammonia into plant-friendly nitrate. Rushing this process by adding fish too early kills them through ammonia poisoning, patience during cycling prevents heartbreak and wasted money. Generally, waiting 4 to 6 weeks is wise, but here's the thing: it's worth it.
Fishless Cycling Methods
Add pure ammonia solution (without surfactants or fragrances) to reach 2-4 ppm ammonia concentration in your system. Calculate dosage based on total water volume: roughly 4 drops per gallon for standard household ammonia (Michigan State University Extension).
Alternatively, add fish food daily as if feeding a full fish load. The decomposing food releases ammonia gradually, though this method takes longer and creates more mess than pure ammonia.
Some growers seed their system with established filter media from a mature aquarium or aquaponics system. This introduces bacteria colonies immediately, cutting cycling time to 2-3 weeks instead of 4-6.
Week-by-Week Cycling Timeline
Week 1: Ammonia levels rise to 2-4 ppm and stay elevated. Nitrite and nitrate remain at zero. The system looks inactive, but bacteria populations are beginning to multiply on media surfaces.
Week 2-3: Ammonia starts dropping as Nitrosomonas bacteria convert it to nitrite. Nitrite spikes to 2-5 ppm, often higher than ammonia ever reached. This nitrite spike is normal and indicates the first bacteria colony is established.
Week 3-4: Nitrite begins falling as Nitrobacter bacteria convert it to nitrate. Nitrate levels climb steadily, often reaching 40-80 ppm. Ammonia should be near zero by now.
Week 4-6: Both ammonia and nitrite drop to zero within 24 hours of adding new ammonia. Nitrate continues accumulating. This signals a fully cycled system ready for fish (ATTRA Sustainable Agriculture).
Testing Schedule and What the Numbers Mean
Test ammonia, nitrite, and nitrate every 2-3 days during cycling. Daily testing provides more data but isn't necessary, bacteria populations double every 24 hours under ideal conditions, so changes appear gradually.
Safe levels for fish: ammonia 0 ppm, nitrite 0 ppm, nitrate below 40 ppm. Anything above zero for ammonia or nitrite indicates incomplete cycling or overfeeding once fish are present.
pH naturally drifts downward during cycling as nitrification produces acid. Monitor pH weekly and add small amounts of calcium hydroxide or potassium bicarbonate if it drops below 6.4. The system self-regulates better once plants start consuming nitrate.
How to Know When Your System Is Ready
Add ammonia to reach 2 ppm, then test 24 hours later. If both ammonia and nitrite read zero, your bacteria colonies can process a full fish load's waste output. If either shows a reading, wait another week and retest.
Perform a 30-50% water change before adding fish to reduce accumulated nitrate levels. High nitrate won't kill fish immediately, but starting with lower levels gives you more buffer before the next water change.
Temperature affects cycling speed, bacteria multiply faster at 75-80°F than at 65°F. Cold systems can take 8 weeks to cycle fully, while warm systems finish in 3-4 weeks.
Adding Fish and Plants: Your First Stocking
Stocking happens in stages to avoid overwhelming your newly established bacteria colonies. Add 25-50% of your target fish population initially, then increase gradually over 2-3 weeks as bacteria populations expand to match the increased waste load.
Selecting and Acclimating Fish
Stock 1 pound of fish per 5-7 gallons of fish tank volume as a conservative starting point. A 50-gallon tank supports 7-10 pounds of fish at maturity, but start with 3-5 pounds to avoid ammonia spikes.
Goldfish and koi tolerate beginner mistakes and survive in unheated systems year-round in moderate climates. Tilapia grow faster and taste better but require 75-85°F water and don't survive cold temperatures. Catfish fall between these extremes in hardiness and growth rate.
Acclimate new fish slowly by floating their bag in your tank for 15-20 minutes to equalize temperature. Then add small amounts of your tank water to the bag every 5 minutes for 30-45 minutes, letting fish adjust to pH and mineral differences before releasing them.
Plant Selection and Placement
Start with seedlings rather than seeds, transplants establish faster and begin removing nitrate immediately. Lettuce, basil, and other leafy greens transplant easily and tolerate the root disturbance of settling into media.
Space plants according to mature size: lettuce needs 6-8 inches between plants, basil needs 8-10 inches, and larger crops like tomatoes need 12-18 inches. Overcrowding creates competition for nutrients and light while increasing disease pressure.
Rinse soil completely from transplant roots before placing them in media. Soil introduces pathogens and organic matter that can spike ammonia levels in newly cycled systems. Bare-root transplants or hydroponically started seedlings work best.
Initial Feeding Guidelines
Feed fish once daily, offering only what they'll consume in 3-5 minutes. Overfeeding is the most common beginner mistake, uneaten food decomposes into ammonia, overwhelming your bacteria colonies and spiking toxicity.
Start with high-quality floating pellets sized appropriately for your fish. Floating food lets you observe feeding behavior and remove uneaten pellets before they sink and decay.
Test water parameters every 2-3 days for the first month after adding fish. Ammonia or nitrite readings above 0.25 ppm indicate overfeeding or insufficient bacteria, reduce feeding by half until readings return to zero.
Ongoing Maintenance and Troubleshooting
Established systems need less intervention than soil gardens, but they require consistent monitoring of water parameters and prompt response when readings drift outside optimal ranges. Most problems announce themselves through test results before fish or plants show visible stress.
Fish Species Comparison for Beginner Aquaponics Systems
| Fish Species | Water Temperature | Hardiness | Growth Rate | Taste Quality | Best For |
|---|---|---|---|---|---|
| Goldfish | 50-72°F | Very Hardy | Slow | Not typically eaten | Beginners, stable systems |
| Koi | 59-77°F | Very Hardy | Slow | Not typically eaten | Outdoor systems, ornamental |
| Tilapia | 75-85°F | Moderate | Fast | Excellent | Established systems, protein production |
| Catfish | 65-85°F | Very Hardy | Moderate | Good | Beginners, temperature flexibility |
Daily and Weekly Tasks
Daily: Feed fish, observe their behavior for signs of stress (gasping at surface, lethargy, loss of appetite), and check that the pump runs continuously. Visual inspection catches equipment failures before they cascade into bigger problems.
Weekly: Test pH, ammonia, nitrite, and nitrate levels. Top off evaporated water, typically 5-10% of system volume per week depending on temperature and plant size. Record all test results and observations in your logbook to spot trends.
Harvest mature plants and replant immediately to maintain consistent nutrient uptake.
Monthly Maintenance Procedures
Remove solid waste that accumulates in the fish tank using a gravel vacuum or small net. Solids create anaerobic zones where harmful bacteria thrive, and they contribute to pH drift as they decompose.
Clean pump intake screens to maintain flow rate. Debris buildup reduces circulation, leading to dead zones in the grow bed where bacteria populations decline.
Inspect all plumbing connections for signs of wear, mineral deposits, or slow leaks. Tighten fittings as needed and replace vinyl tubing every 12-18 months before it becomes brittle.
Common Problems and Solutions
Cloudy water indicates bacterial bloom (harmless, clears in 3-5 days), algae growth (reduce light exposure to water), or suspended solids (improve mechanical filtration). Green water specifically means algae, cover exposed water surfaces and reduce light.
High pH (above 7.6) typically results from new media buffering or low nitrate consumption. Add plants, increase stocking density gradually, or use pH down products sparingly. Low pH (below 6.4) comes from excessive nitrification, add calcium carbonate or potassium bicarbonate in small doses.
Ammonia or nitrite spikes after cycling suggest overfeeding, dead fish decomposing unnoticed, or bacteria die-off from medication or chlorinated water. Stop feeding for 24 hours, test for dead fish, and perform a 30% water change with dechlorinated water.
Slow plant growth points to insufficient light (add supplemental lighting or move system), low nitrate levels (increase feeding or fish population), or pH outside optimal range (adjust toward 6.8-7.0). Plants also grow slowly in cold water, most species prefer 65-75°F.
When to Perform Water Changes
Mature systems rarely need water changes if plant coverage matches fish waste production. Well-balanced systems run for months with only evaporation top-offs.
Change 10-20% of system volume monthly if nitrate climbs above 80 ppm despite adequate plant coverage. Very high nitrate (150+ ppm) can inhibit plant growth and indicates severe imbalance between fish waste and plant uptake.
Emergency water changes (30-50%) become necessary when ammonia or nitrite spike above 1 ppm. Use dechlorinated water matched to system temperature, and don't change more than 50% at once, dramatic parameter shifts stress fish worse than gradual improvement.
Your aquaponics system becomes more stable with age as bacteria populations mature, plant root systems expand, and you dial in the feeding rate that matches your specific setup. Last summer I discovered nitrate at 160 ppm in a system where the tomato plants had suddenly stopped setting fruit despite perfect flowering. The water looked clear, the fish seemed fine, but those deep red test results told the real story—I'd overstocked fish relative to my plant coverage, and within two days of a 40% water change and adding another grow bed, new blossoms started developing again. The learning curve feels steep initially, but honestly, most systems find their balance within three months of starting fish. Start with this proven design, monitor your parameters consistently, and resist the urge to tinker when numbers look good, stability matters more than perfection in aquaponics.
Related Articles
- How Does an Aquaponics System Work? The Complete Cycle Explained
- Types of Aquaponics Systems: Design Methods & Best Practices
- 6 Main Types of Aquaponics Systems Compared
- Best Fish for Aquaponics Systems: Complete Species Guide
- Aquaponics System Pros and Cons: Is It Right for You?
- Complete Guide to Aquaponics Systems: How They Work & Getting Started
Frequently Asked Questions
How long does it take before I can add fish and plants to my aquaponics system?
You need to wait 4-6 weeks for the beneficial bacteria colonies to establish in your grow media through a process called cycling. During this period, you'll monitor ammonia, nitrite, and nitrate levels until they stabilize, indicating the system is ready to support fish and plant life.
What's the minimum fish tank size to start an aquaponics system?
A 50-gallon fish tank is a practical starting point, allowing you to safely stock 3-5 pounds of fish initially and expand to 7-10 pounds as you gain experience. Larger tanks provide more water volume, which dilutes waste and creates greater stability when water parameters fluctuate.
Can I use tap water to fill my aquaponics system?
The article doesn't explicitly address tap water, but standard aquaponics practice allows tap water if you let it sit 24-48 hours to allow chlorine to dissipate, or use a dechlorinator. Check local water quality reports, as high chlorine or heavy metals may require filtration before use.
What plants should I grow in my first aquaponics system?
Start with leafy greens and herbs like lettuce, basil, mint, cilantro, chard, kale, and pak choi because they have low nutrient demands and reach harvest size in just 4-6 weeks. These beginner-friendly crops are forgiving and provide quick results to build your confidence.
Do I need to do water changes in an aquaponics system?
The article mentions water changes in the maintenance section but doesn't detail the frequency. Typically, you perform small water changes (10-20% monthly) to replace minerals consumed by plants and account for evaporation, rather than the large changes needed in traditional aquariums.
What fish are best for beginners?
Goldfish and koi are ideal for new systems because they tolerate the water quality fluctuations common during the learning phase. Once you've stabilized your system parameters, tilapia are an excellent choice because they grow quickly and provide a protein harvest.
How much does it cost to build a beginner aquaponics system?
The article includes a complete budget breakdown section, though specific costs aren't detailed in the excerpt. Budget will vary based on system size, materials quality, and whether you source components locally or online, but expect to invest in a fish tank, pump, grow bed, media, and testing supplies.
Can I run my aquaponics system in a basement or indoors?
Yes, aquaponics systems can run indoors or in basements, but you'll need to provide artificial lighting for plant growth and ensure proper ventilation for the fish tank. The article mentions location selection is important but doesn't detail specific indoor requirements.